Today we're going to learn what is clarified butter and how can we make it at home, in the most simplest way.
Back to the basics! Until recently, the only kind of oils/butter I used in my kitchen were cold pressed coconut and olive oil, but I have decided to give ghee butter a try as well. The first time I bought it I thought it has maybe gone bad or that was salty, because the smell reminded me of parmesan cheese :D , however I realized only later that that is the way it should be. Since the preparation of clarified butter is so simple and the price of it in stores so high, I started making it on my own at home.
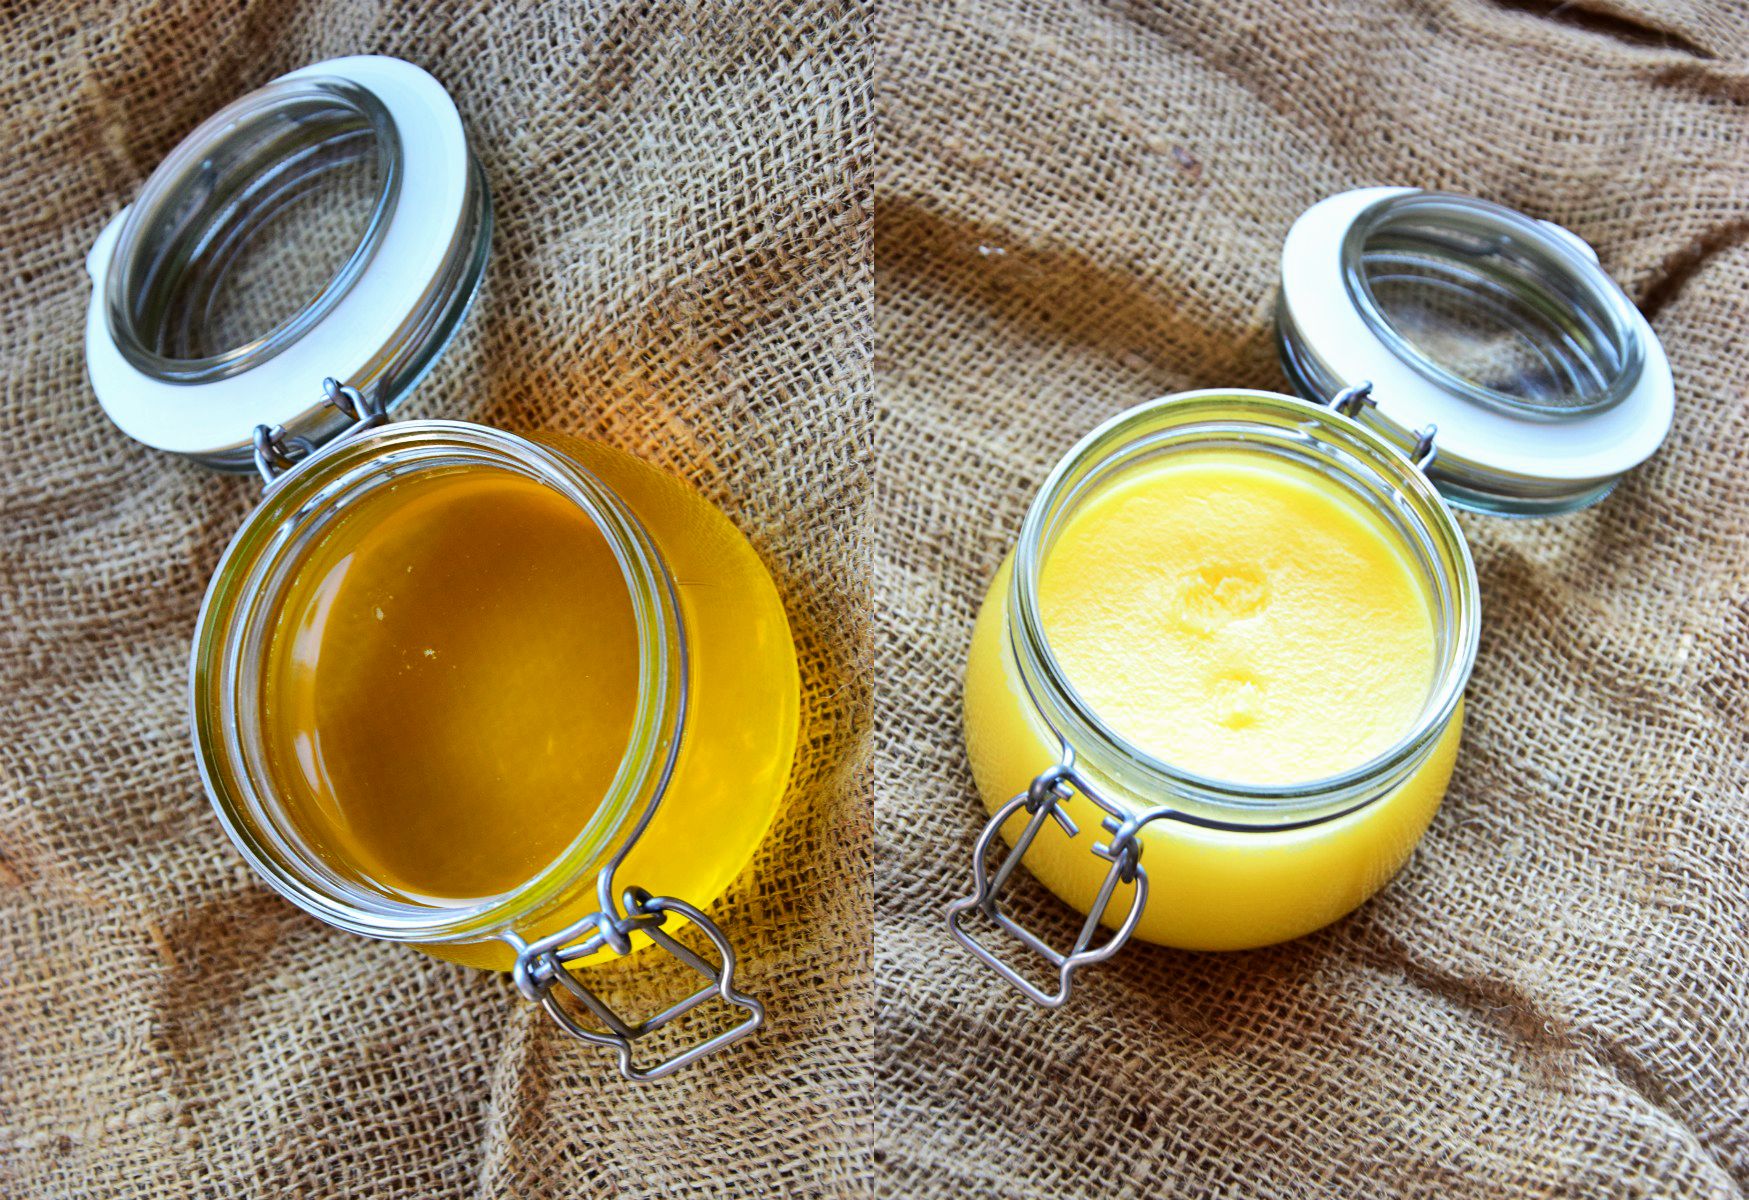
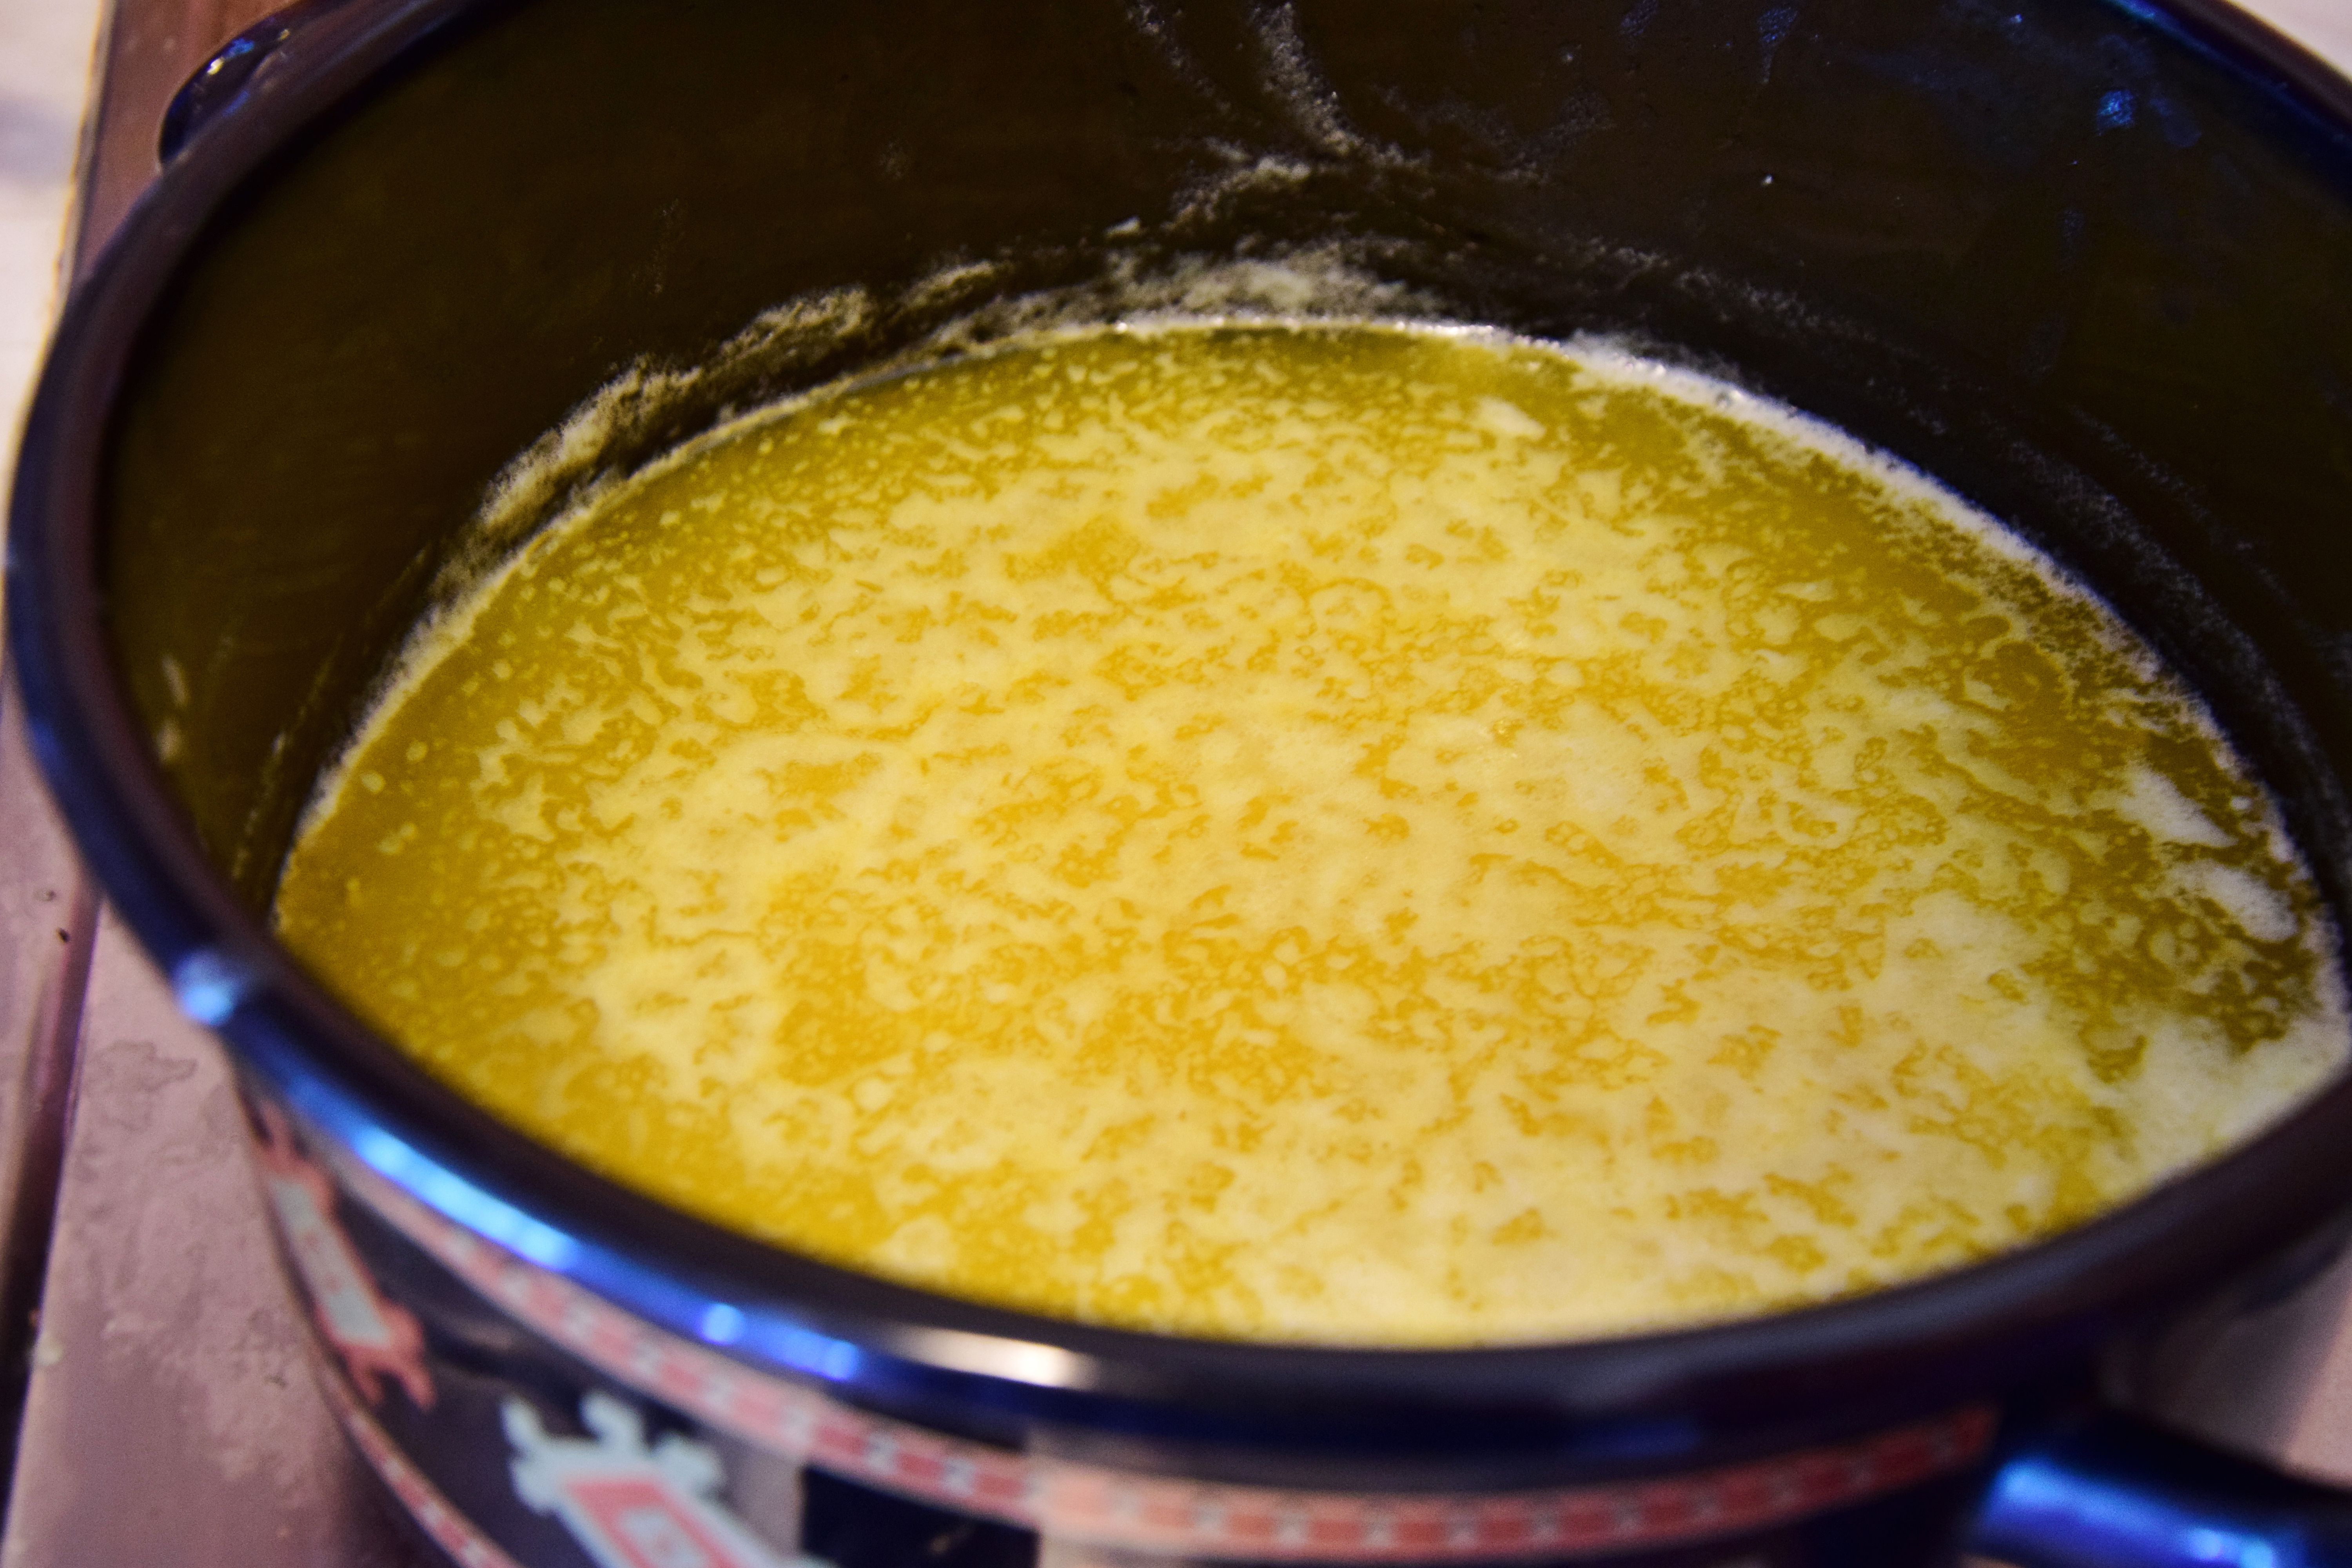
Ghee butter is the so called clarified butter that you get by cooking the regular butter, over low heat.
During the process of cooking, there is the separation of "solids" in the form of white foam that you remove with a spoon in order to get a clarified liquid.
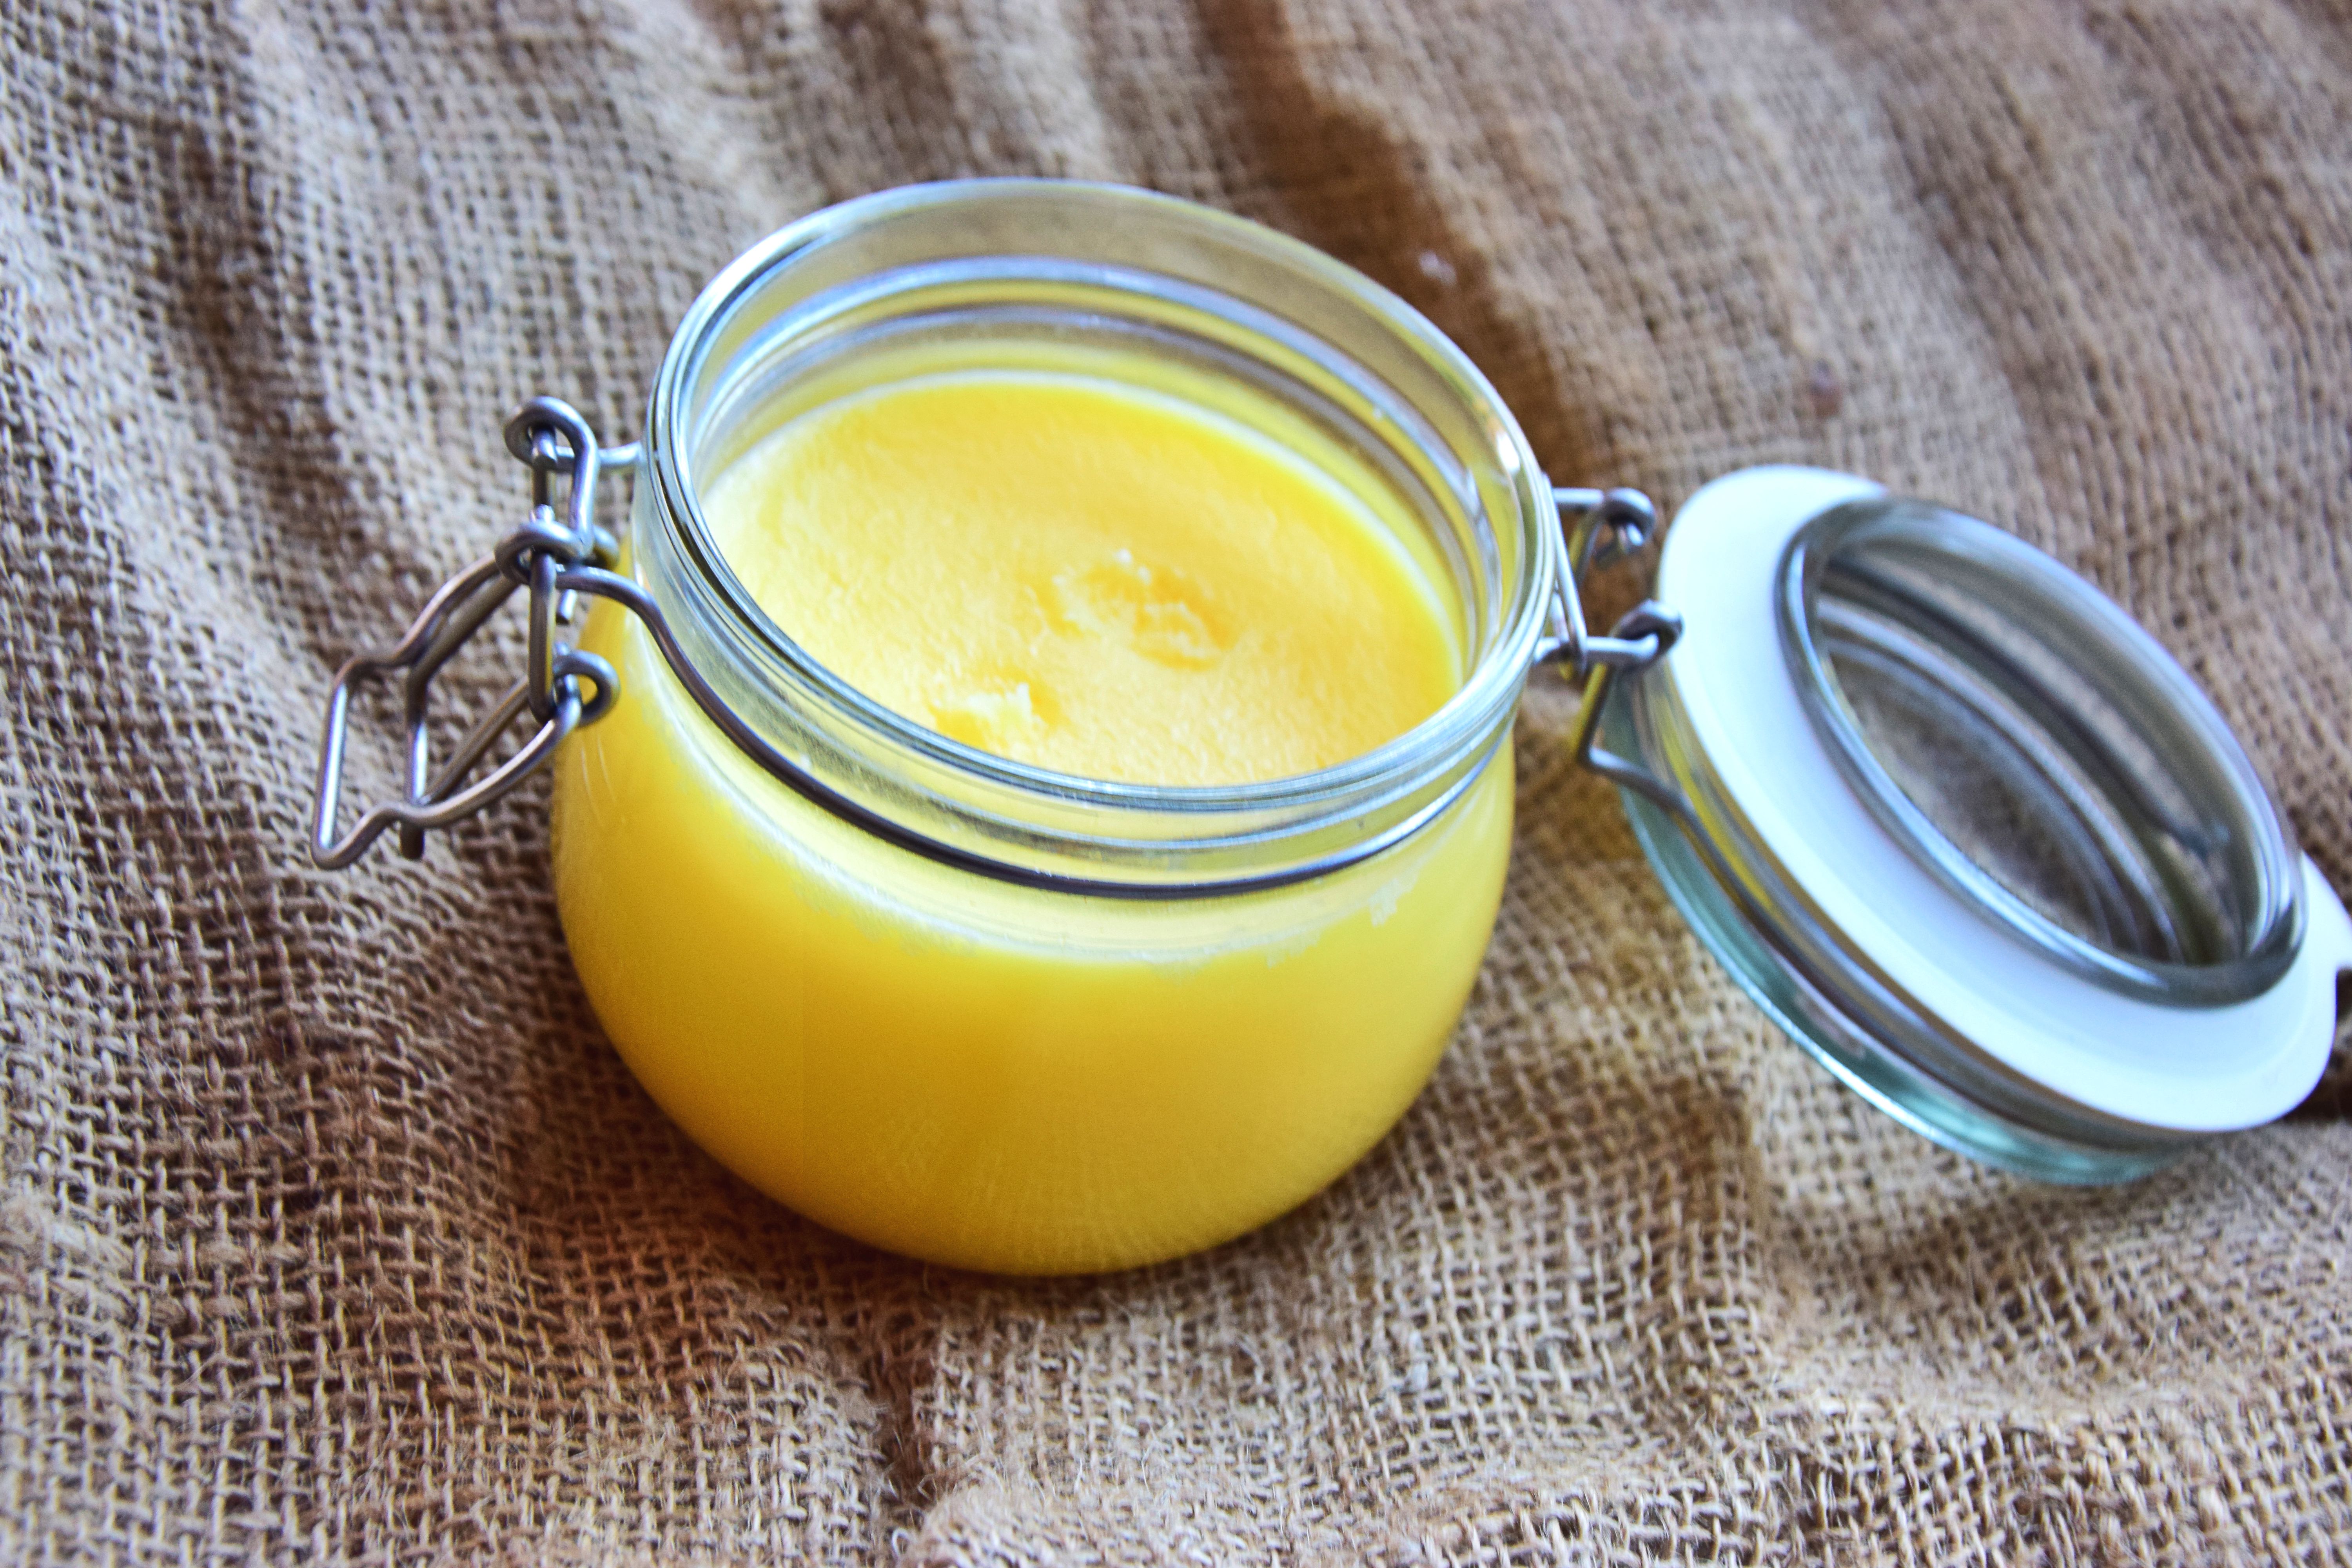
This butter should be kept on room temperature in jar and it won't go bad.
First, you will get a clear oil that will turn to a creamy yellow butter, once cold.
Ghee doesn't contain casein and lactose, which makes it perfect for people who are usually intollerant to milk products.
It does contain though, saturated and unsaturated fatty acids, but it lowers the level of bad cholesterol in our blood.
It is a natural butter, that has always been used in the past, which doesn't contain preservatives, aromas, colours nor additional sugar and salt.
Except for culinary purposes, it is reccomended to be used by taking 1 tsp first thing in the morning because it warms the body and enhances the removal of toxins from the body, meaning it enhances and stimulates the digestion.
Also, it can be used alone or with honey for external application with all sorts of skin problems or wounds.
The preparation itself is sooo simple, as I already said, so I definitely reccomend you make it on your own at home. The store bought ghee is so expensive, especially when you see how little you get for the price you payed.
All you need to make it is butter, preferibly homemade, a pot, a spoon, a cheesecloth and a jar to store the butter.
You should get a smilar grammage of the inital butter you used for making the ghee butter.
Ingredients for Ghee butter
- regular cow butter*
You will set the grammage on your own. I would reccomend you take 500 g of butter at least, because if you are already going through the whole process, 250 g seems just to small.
- Place chunks of butter, that you have previously chopped, in a pot that you will use for cooking.
- Turn on the heat and warm the butter over low heat so it starts to melt slowly.
- You can turn the heat just a little higher in order to make the butter cook faster, but it might even not be necessary. If you turn the heat to much, your ghee butter might burn and that's something you have to avoid at all cost.
- A white foam will start to form on the surface and you will have to remove it gently with a spoon. Do not stir the butter! Repeat the process as much times it will be needed in order to get it clarified. Depending on the quantity you use, this process might take up to 40 minutes, so arm yourself with patience.
- Once you get an intense smell of the butter and it gets clear, almost transparent (you should be able to see the bottom of your pot) and the foam disappears, remove it from the heat.
- Prepare the jar and the cheesecloth that you'll use to strain the liquid. Strain the butter and leave it to cool completely before covering the top.
- Once cooled, it should have a bright, yellow colour and should thicken to the point of a creamy buttery texture.
- Store in a jar on room temperature.